What is a Manual Water Pump?
Manual water pumps offer a portable and hand-operated solution for liquid transfer, notably bottle water, requiring no electricity for operation.
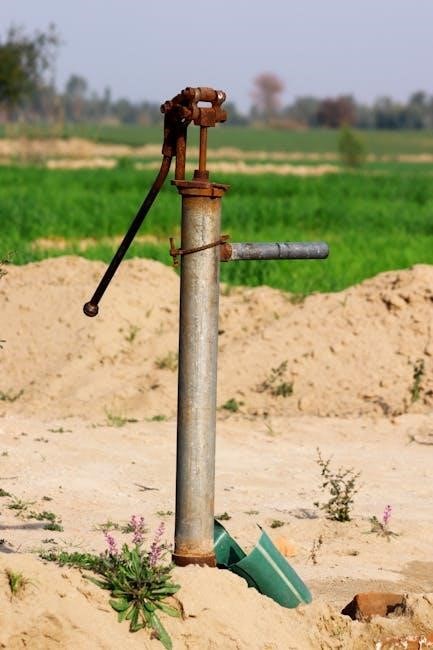
Manual water pumps are self-contained devices designed for fluid transfer utilizing human power, eliminating the need for electrical sources. These pumps are characterized by their portability and hand-press operation, making them ideal for situations where electricity is unavailable or impractical.
Typically constructed with plastic and mild steel components, they efficiently move liquids like water, with flow rates ranging from 40-50 litres/min and a lift capacity of up to 15 meters. Their compact size – around 20cm x 7.5cm x 8.5cm – enhances their usability.
A key requirement is priming – filling the pump chamber with water before operation – to establish suction. Careful positioning, close to the liquid source, prevents suction hose issues.
Historical Context and Evolution
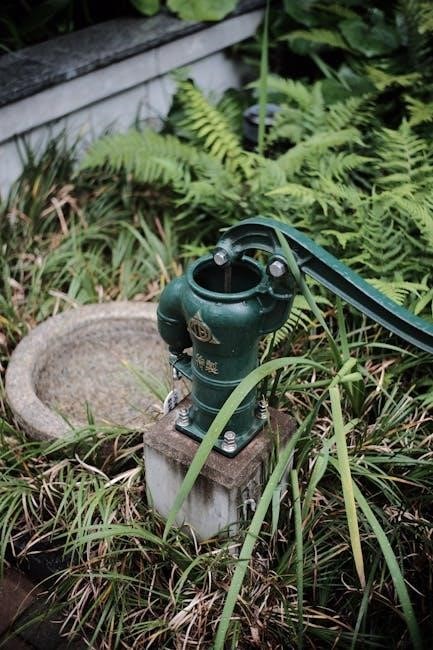
Historically, manual water pumps evolved from basic human-powered devices to more refined mechanisms addressing water access needs. Early iterations relied on simple levers and buckets, gradually incorporating mild steel components for durability – notably in the pump frame and chamber.
The requirement for efficient water delivery spurred advancements in piston and cylinder design, optimizing suction and displacement. Modern pumps, while retaining the core principle of manual operation, benefit from lightweight plastic parts, enhancing portability.
The need for reliable, off-grid water solutions continues to drive innovation, focusing on improved flow rates (around 1.5 m3/h) and ease of use, maintaining the fundamental requirement of human power for operation.
Basic Components of a Manual Water Pump
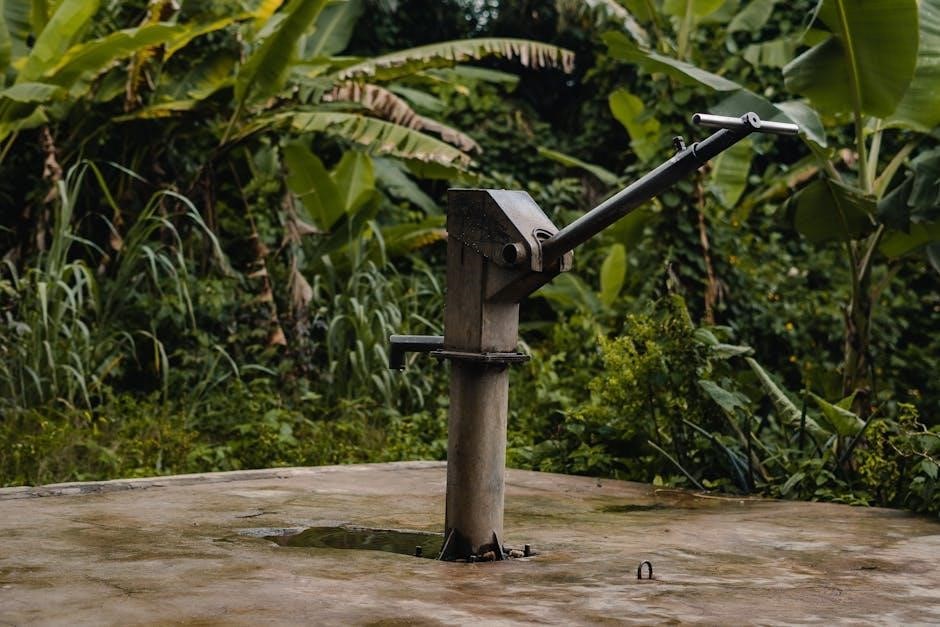
Pump Frame (Mild Steel Angular Bar)
Mild steel angular bars construct the pump’s robust frame, providing structural support and durability for consistent manual operation and longevity.
The pump frame, critically constructed from mild steel angular bar, forms the foundational skeleton of the entire manual water pump assembly. Its primary requirement is to provide unwavering structural rigidity and support for all other operational components. This robust framework must withstand the repetitive stresses induced by manual operation, ensuring long-term durability and preventing deformation under load.
The angular bar design specifically contributes to increased strength and stability, distributing forces effectively throughout the structure. The mild steel material offers a balance between cost-effectiveness, weldability, and sufficient tensile strength for the intended application. Proper fabrication and welding techniques are essential to maintain the frame’s integrity and prevent failure points. A well-designed frame minimizes vibration and ensures efficient power transfer from the operator to the pumping mechanism, ultimately maximizing performance and extending the pump’s service life.
Pump Chamber (Mild Steel)
The pump chamber, typically fabricated from mild steel, is a crucial component responsible for containing the liquid during the pumping process. Its primary requirement is to be completely sealed and capable of withstanding the pressures generated during both the suction and displacement phases of operation. The mild steel construction provides the necessary strength and durability to resist deformation and prevent leaks, ensuring efficient fluid transfer.

The chamber’s internal surface must be relatively smooth to minimize friction and maximize pumping efficiency. Precise machining and finishing are essential to achieve a proper seal with the piston and other internal components. Furthermore, the material must be compatible with the liquids being pumped to prevent corrosion or contamination. A robustly constructed pump chamber is fundamental to reliable and consistent pump performance, contributing significantly to the overall longevity of the device.
Pump Cylinder
The pump cylinder, a vital element within the manual pump, demands precise internal dimensions and a smooth bore surface. Its core requirement is to provide a close-fitting, leak-proof guide for the piston’s reciprocating motion. This ensures efficient transfer of force from the handle to the liquid being pumped. Constructed typically from mild steel, the cylinder must exhibit high rigidity to maintain its shape under pressure and resist deformation during repeated cycles.
Material compatibility is paramount; the cylinder’s inner surface must resist corrosion from the pumped fluid. Accurate machining is crucial for a consistent diameter, maximizing volumetric efficiency. A well-designed cylinder minimizes friction, reducing operator effort and extending the pump’s lifespan, ultimately contributing to reliable and consistent performance.
Piston and Piston Guide
The piston and piston guide are integral for converting reciprocating motion into fluid displacement. The piston, requiring a tight seal against the cylinder wall, must be durable and resistant to wear, preventing leakage and maintaining pump efficiency. The piston guide ensures smooth, aligned movement within the cylinder, minimizing friction and preventing binding.
Precise manufacturing tolerances are critical for both components; a properly fitted piston guide extends component life and reduces energy loss. Materials must be chemically compatible with the pumped liquid to avoid corrosion or degradation. Replacement parts, like the piston guide and spacers, are essential for maintaining optimal pump performance and addressing wear over time, ensuring continued reliable operation.

Operational Principles
Suction Mechanism
Manual water pumps utilize a reciprocating action to create a vacuum, drawing fluid through the inlet via atmospheric pressure and manual force.
The suction mechanism is fundamental to a manual water pump’s function. Initially, the piston moves upwards, increasing the volume within the pump cylinder. This expansion generates a partial vacuum, reducing the pressure inside. Consequently, atmospheric pressure acting on the water source forces the liquid into the pump chamber through the inlet valve.

Crucially, the inlet valve is designed to open inwards, allowing fluid entry while preventing backflow. As the piston descends, it compresses the water, increasing the pressure. This pressure closes the inlet valve and simultaneously opens the outlet valve, enabling the water to be discharged. The efficiency of this suction relies on a proper seal and minimizing air leaks within the system, ensuring effective liquid transfer.
Displacement and Delivery
Displacement and delivery characterize the pump’s output. The descending piston physically displaces the water within the cylinder, converting mechanical energy into fluid pressure. This pressurized water then seeks the path of least resistance – through the open outlet valve.
Performance is quantified by flow rate, typically 40-50 litres/min for this pump type, and head/lift capacity, reaching up to 15 meters. The pump operates effectively within an RPM range of 2,000-3,000, influencing both flow and pressure. A 20mm inlet ensures adequate water intake, while efficient valve operation is vital for consistent delivery. Proper priming—filling the pump housing with water—is essential for initiating this displacement process.
Specifications and Performance Characteristics
Key specifications include a flow rate of 1.5 m3/h, a lift capacity up to 15 meters, and a 20mm inlet dimension for efficient operation.
Flow Rate (e.g., 1.5 m3/h, 40-50 litres/min)
Flow rate is a critical performance indicator for manual water pumps, defining the volume of liquid moved per unit of time. These pumps typically demonstrate a capacity ranging from 40 to 50 litres per minute, providing a substantial output for various applications.
For larger-scale needs, pumps can achieve flow rates of approximately 1.5 cubic meters per hour. This versatility allows selection based on specific demands, whether it’s transferring cooling water or supplying portable water sources.
Understanding the required flow rate is essential for choosing a pump that efficiently meets the task at hand, balancing speed and volume for optimal performance.
Head/Lift Capacity (e.g., up to 15 meters)
Head, or lift capacity, signifies the maximum vertical distance a manual water pump can effectively move liquid. Commonly, these pumps are designed to handle lifts of up to 15 meters, making them suitable for drawing water from wells, tanks, or lower elevations.
This specification is crucial when determining pump suitability for a specific application. Higher lift requirements necessitate pumps with greater power and robust construction.
Considering the vertical distance, alongside any frictional losses in the piping, ensures the selected pump can deliver the desired flow rate at the intended destination; Accurate assessment of head requirements is vital for efficient operation.
Inlet and Outlet Dimensions (e.g., 20mm inlet)
Inlet and outlet dimensions are critical for compatibility with existing plumbing and hose systems. A typical manual water pump features a 20mm inlet, dictating the hose or pipe size required for drawing liquid into the pump.
Matching these dimensions ensures a secure and leak-proof connection, maximizing pumping efficiency. The outlet size also influences flow rate and the ability to connect to downstream equipment or storage containers.
Careful consideration of these specifications prevents the need for costly adapters and ensures seamless integration into the overall fluid transfer system. Proper sizing is fundamental for optimal performance.
RPM Range (e.g., 2,000-3,000 RPM)
Rotations Per Minute (RPM) significantly impact a manual water pump’s performance, influencing both flow rate and pumping efficiency. These pumps generally operate within a range of 2,000 to 3,000 RPM, achieved through manual hand-cranking or lever action.
Higher RPMs typically translate to increased flow, but also require greater physical effort from the operator. The optimal RPM depends on the specific application and the viscosity of the liquid being pumped.
Maintaining consistent RPMs is crucial for stable output. Understanding this range allows users to adjust their pumping speed for desired results, balancing effort and output volume effectively.

Pre-Operation Preparation
Priming the Pump (Filling with Water)
Priming is essential; fill the pump housing with clean water before use to displace air and establish initial suction for effective operation.
Priming a manual water pump is a crucial preparatory step, directly impacting its ability to efficiently draw and deliver fluids. Before initiating operation, the pump housing must be filled with clean water. This process effectively displaces any air present within the pump chamber and suction line.
Air pockets hinder the creation of the necessary vacuum for suction, preventing the pump from self-priming. Removing this air establishes a continuous column of water, enabling the piston to generate the required pressure differential.
To prime, carefully remove the filler plug located on the pump housing and slowly pour water until the chamber is full. Ensure no air bubbles remain trapped. Proper priming guarantees optimal performance and prevents damage to the pump’s internal components.
Positioning for Optimal Operation
Strategic positioning of the manual water pump is paramount for safe and effective operation. A key consideration is minimizing the distance between the pump and the water source. The suction hose exhibits a tendency to pull the pump towards the liquid during operation, creating a potential hazard.
Therefore, placing the pump as close as practically possible to the intake point mitigates this risk and ensures a stable pumping process.
Furthermore, a level and stable surface is essential to prevent tipping or instability during use. Proper positioning, combined with a securely anchored suction hose, maximizes efficiency and safeguards against accidents, contributing to a reliable water transfer process.
Suction Hose Considerations (Avoiding Pull Towards Source)
A critical safety aspect when utilizing a manual water pump involves careful attention to the suction hose. This component inherently creates a pulling force towards the water source during operation, potentially dragging the pump and posing a risk to the operator.
To counteract this, always position the pump as closely as feasible to the liquid being drawn. Securely anchoring the pump itself can further minimize movement. Inspect the hose for any cracks or weaknesses before each use, ensuring a tight seal to maximize suction and prevent air leaks.
Regularly check the hose’s connection points for stability, guaranteeing a safe and efficient pumping experience.

Applications of Manual Water Pumps
Portable Water Supply
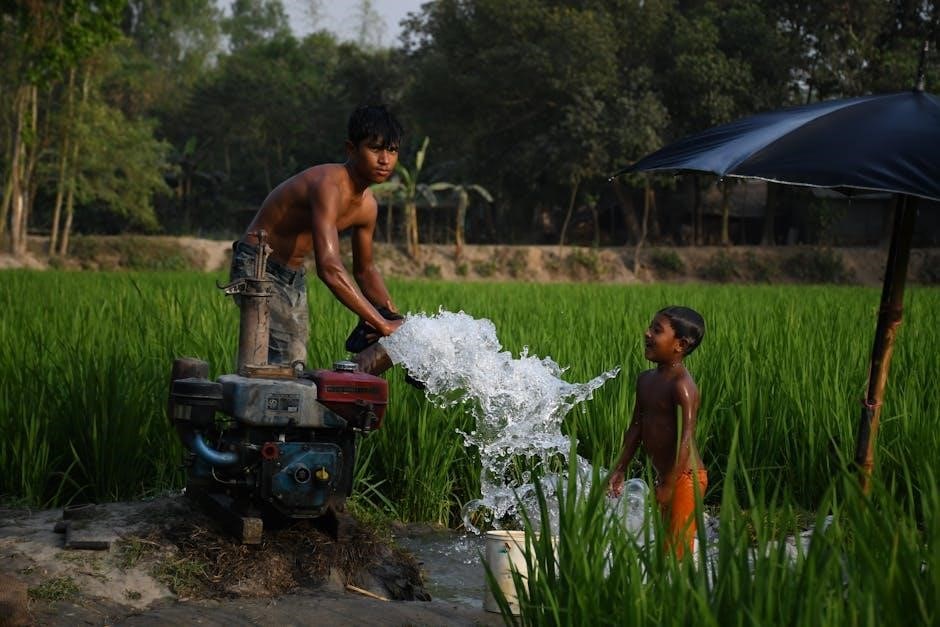
Manual pumps excel in portable water supply, bottle water pumping, and cooling water transfer, offering a lightweight and readily deployable solution.
Manual water pumps are exceptionally well-suited for establishing a portable water supply in locations lacking established infrastructure or during temporary needs. Their inherent portability – often lightweight and compact with dimensions around 20cm x 7.5cm x 8.5cm – makes them easily transportable to remote sites, campsites, or emergency situations.
These pumps efficiently transfer liquids, operating within a 2,000-3,000 RPM range and achieving flow rates of 40-50 litres per minute. They are particularly useful when a quick and reliable water source is required without relying on electrical power. The 20mm inlet allows compatibility with standard hoses, and a lift capacity of up to 15 meters provides versatility in various scenarios.
Bottle Water Pumping
Manual bottle water pumps provide a convenient and efficient method for dispensing water from large containers. These pumps, often described as “hand press type” and lightweight, eliminate the need to lift and pour heavy bottles, making hydration easier and safer. Their compact size – approximately 20cm x 7.5cm x 8.5cm – allows for easy storage and use in various settings.
The pumps operate effectively with a 20mm inlet, compatible with standard bottle openings, and deliver water at rates between 40-50 litres per minute. This makes them ideal for homes, offices, or events where bottled water is frequently used, offering a practical alternative to manual lifting.
Cooling Water Transfer
Manual water pumps serve as a reliable solution for transferring cooling water in various applications, particularly where electrical power isn’t readily available or practical. These pumps are specified for cooling water systems, handling media effectively with flow rates reaching 1.5 m3/h. Their ability to operate within an RPM range of 2,000-3,000 ensures consistent fluid movement.
Crucially, positioning the pump close to the water source is vital, as the suction hose can pull the pump towards it during operation. This simple precaution ensures stable and efficient cooling water circulation, making manual pumps a valuable asset in maintaining optimal temperatures in diverse industrial or agricultural settings.

Materials Used in Construction
Plastic Components
Manual water pumps utilize plastic for lightweight construction, like the pump body (20cm x 7.5cm x 8.5cm), enhancing portability and ease of handling.
Plastic plays a crucial role in modern manual water pump construction, primarily due to its lightweight nature and cost-effectiveness. The body of many portable bottle water pumps, for instance, measures approximately 20cm x 7.5cm x 8.5cm and is entirely constructed from plastic materials. This design prioritizes ease of transport and handling, making these pumps ideal for various applications where electrical power isn’t available or practical.
Beyond weight reduction, plastic components offer resistance to corrosion from the liquids being pumped, extending the pump’s lifespan. While mild steel forms the structural core in some designs, plastic elements contribute significantly to the overall functionality and user experience, particularly in consumer-grade models.
Mild Steel Components
Mild steel remains fundamental in constructing robust manual water pump frameworks, particularly the pump frame itself, often fabricated from angular bar mild steel. This material provides the necessary structural integrity to withstand the mechanical stresses generated during pumping operations. The pump chamber is also frequently manufactured from mild steel, ensuring durability and resistance to wear and tear.
Furthermore, the pump cylinder benefits from mild steel’s strength, housing the piston and facilitating efficient liquid displacement. While plastic components contribute to portability, mild steel underpins the pump’s core functionality, enabling it to achieve flow rates of up to 1.5 m3/h and lift capacities reaching 15 meters.
Maintenance and Troubleshooting
Valve Inspection (High Pressure Water Pump Valve)
Regularly inspect the high-pressure water pump valve (part 250139 0391) for wear, and replace components like the piston guide (036.0007.0043) as needed.
Consistent valve inspection is crucial for maintaining optimal pump performance. Specifically, the high-pressure water pump valve, identified by part number 250139 0391, requires periodic checks for signs of wear or damage. A malfunctioning valve directly impacts the pump’s ability to generate sufficient pressure for effective liquid transfer.
Look for any obstructions or corrosion that might hinder proper sealing. Furthermore, assess the condition of associated components, such as the piston guide (part 036.0007.0043) and spacers (036.0007.0044), as these contribute to smooth piston movement and valve operation. Timely replacement of worn parts prevents further damage and ensures continued reliable operation of the manual water pump.
Component Replacement (Piston Guide, Spacers)
Regular component replacement is vital for sustained pump functionality. The piston guide (part number 036.0007.0043) and spacers (036.0007.0044) are subject to wear and tear during operation, impacting piston movement and overall efficiency. Replacing these components proactively prevents more significant damage to the pump chamber and piston itself.
Signs indicating the need for replacement include reduced flow rate, inconsistent pumping action, or noticeable friction during operation. Ensure the new components precisely match the original specifications for proper fit and performance. Proper installation, following manufacturer instructions, is essential to maintain the pump’s 40-50 litres/min capacity and 15-meter lift capability.